 Zenith LAMP Replacement “How-To” Guide
This guide is presented to show you, the consumer, how easy and trouble free it is to change the consumable lamp inside your Zenith Projection LCD TV.
Buying just the lamp (instead of the lamp + enclosure) is a smart choice because:
1) less expensive
2) less waste
One word of caution — Do NOT purchase generic brand lamps such as LTI, APO or third-party manufacturers such as OSRAM. These lamps where NOT engineered with your TV…only your Philips lamp has been engineered to work flawlessly and display the best possible color and experience for the consumer. Above that, it just doesn’t make sense to choose an aftermarket lamp for $5-$10 difference (or in many cases more money!!). Discount-Merchant.com promises to be the low price leader in all Projection TV Lamps they carry…if this is not true, let us know and we’ll fix it!
Necessities:
Straight from Zenith themselves…Here is a 3 page supplement guide to this write-up for locating your enclosure and resetting your lamp counter
1. Standard Philips Screwdriver
2. Pair of Pliers
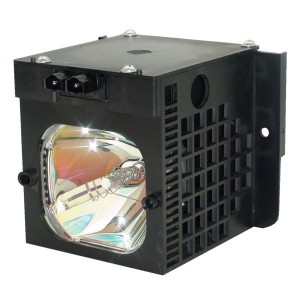
3. A new Philips Lamp
4. 15 minutes of your time
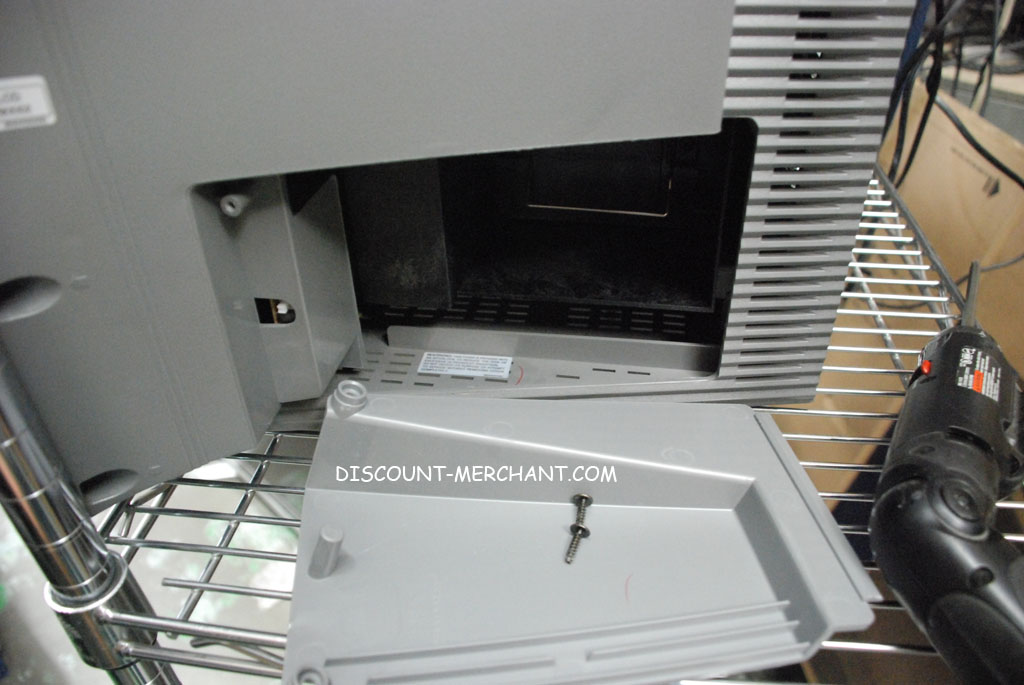
Step 1: Locate the lamp enclosure! Remember, click to enlarge any photo!

Step 2: Now unscrew the lamp cover to expose the enclosure
Step 3: We can see a metal handle to pull the assembly out, but first there are two screws!

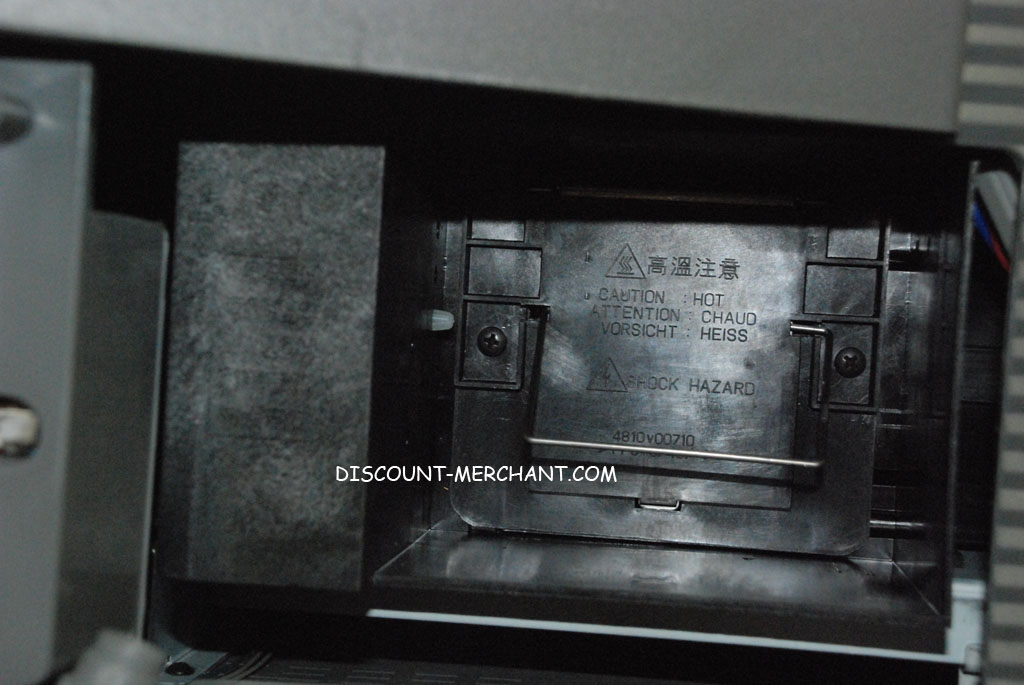
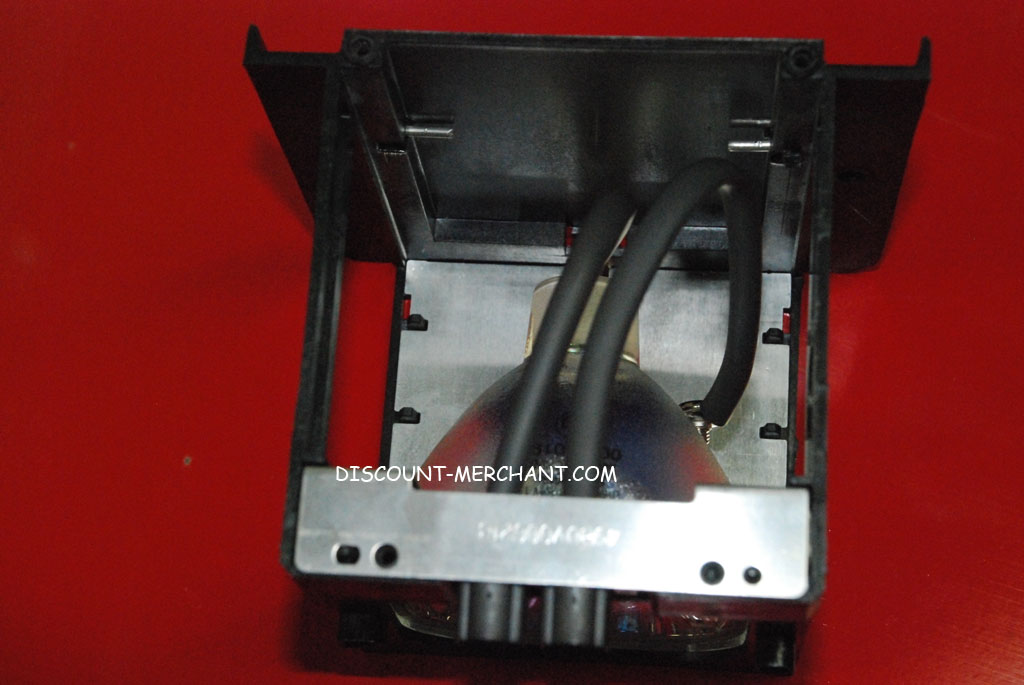
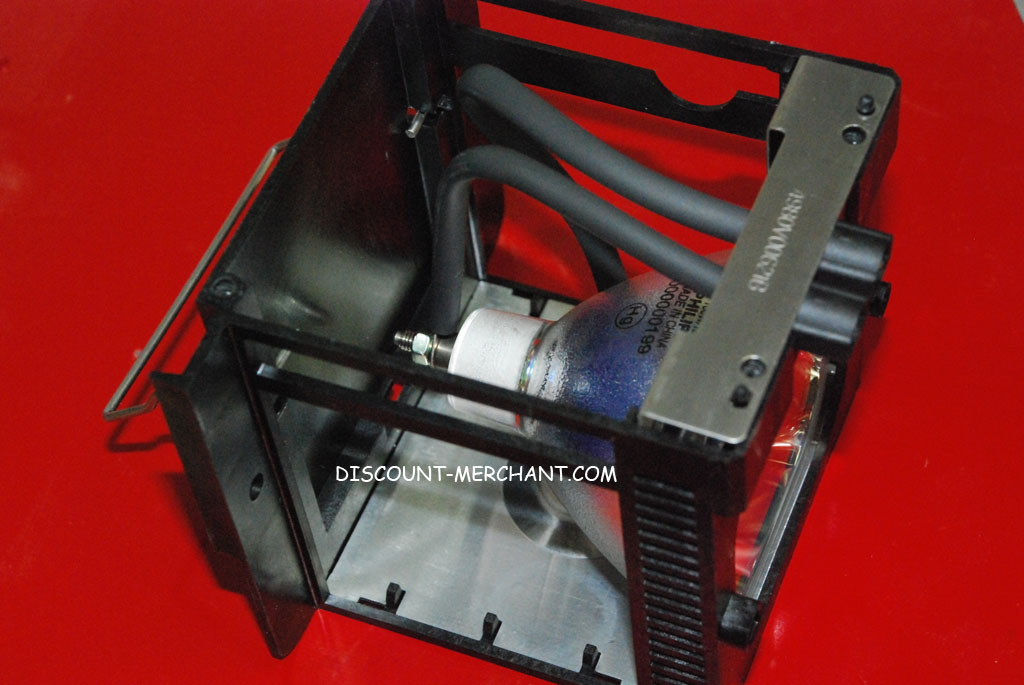
Step 4: With the enclosure removed, we need to unscrew the metal cover of the enclosure:

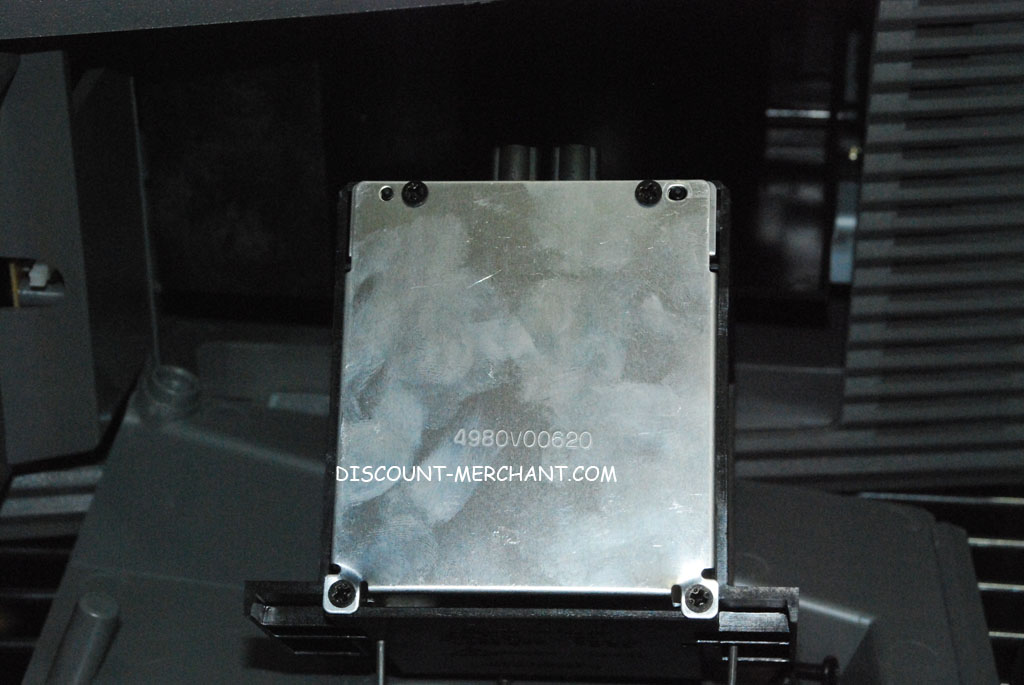

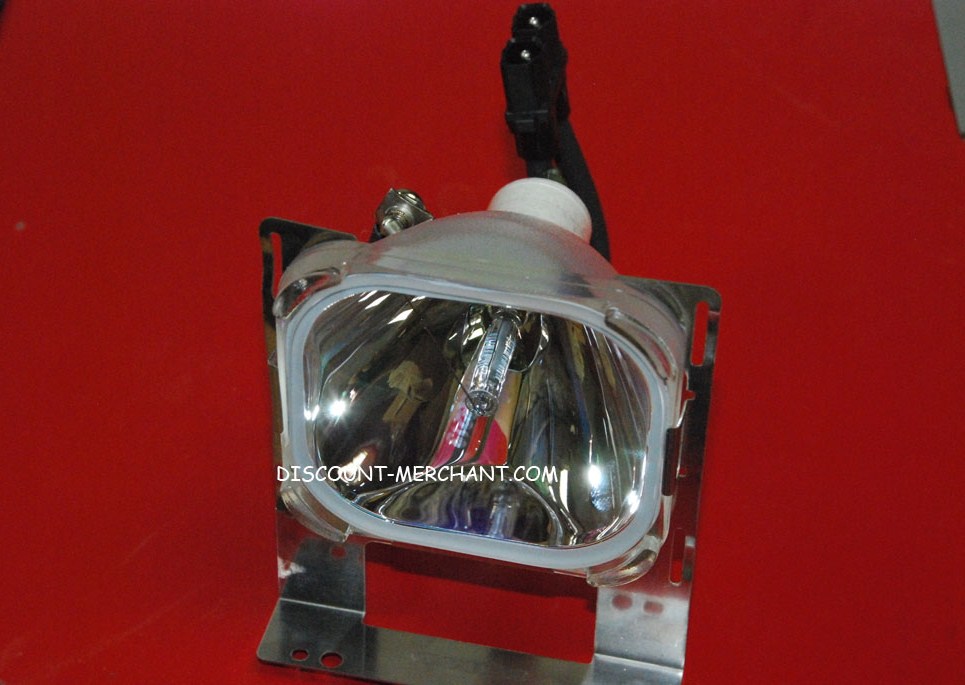
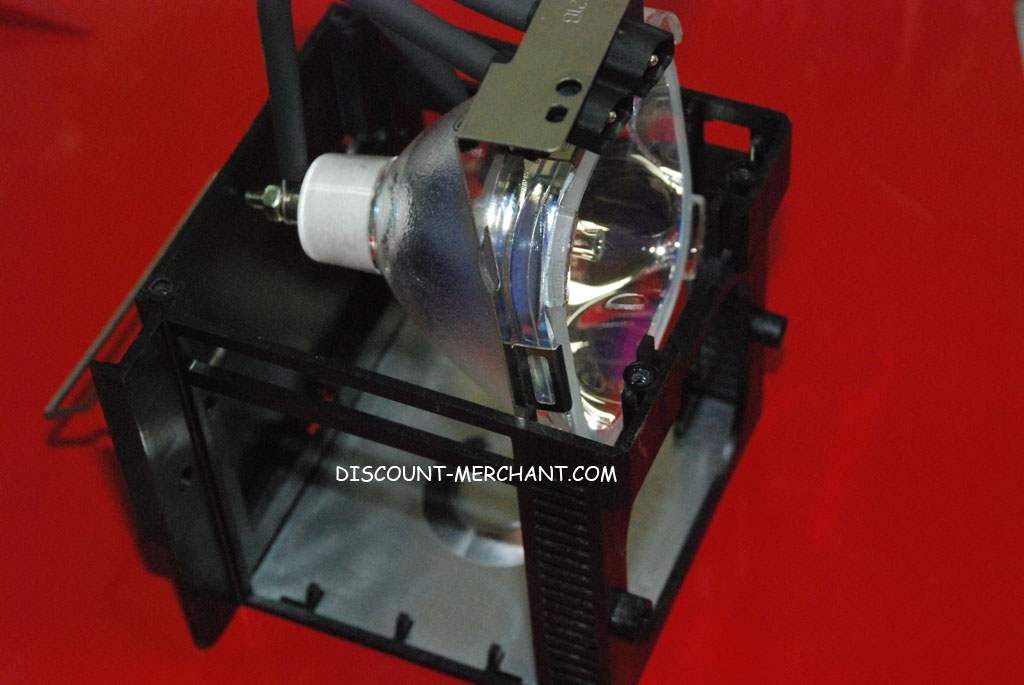
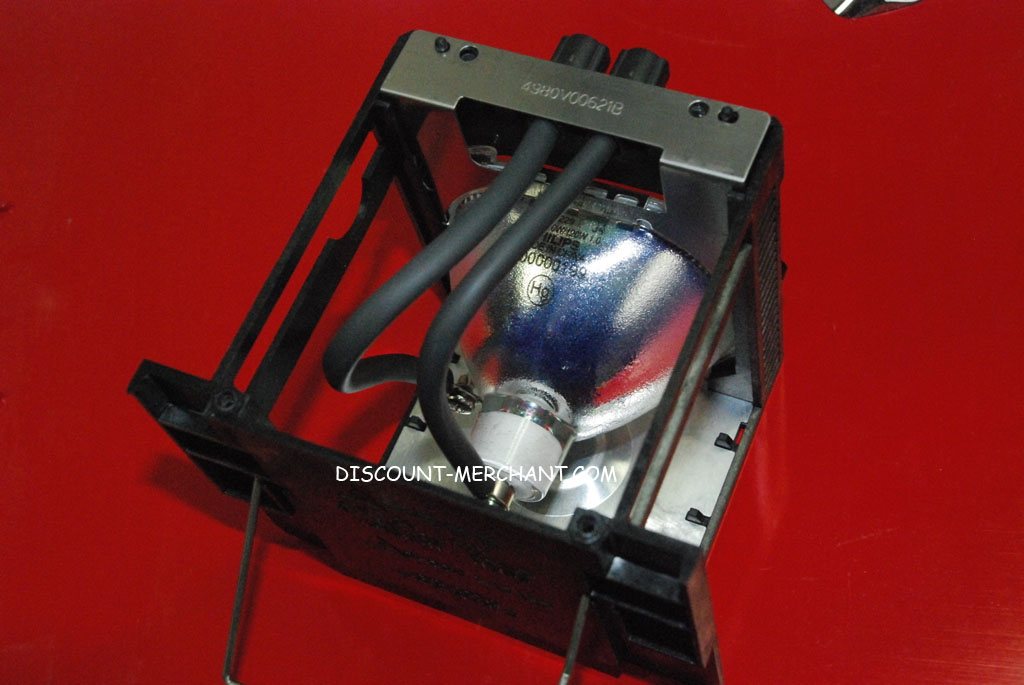
Step 5: With the metal cover off, here is what your lamp looks like
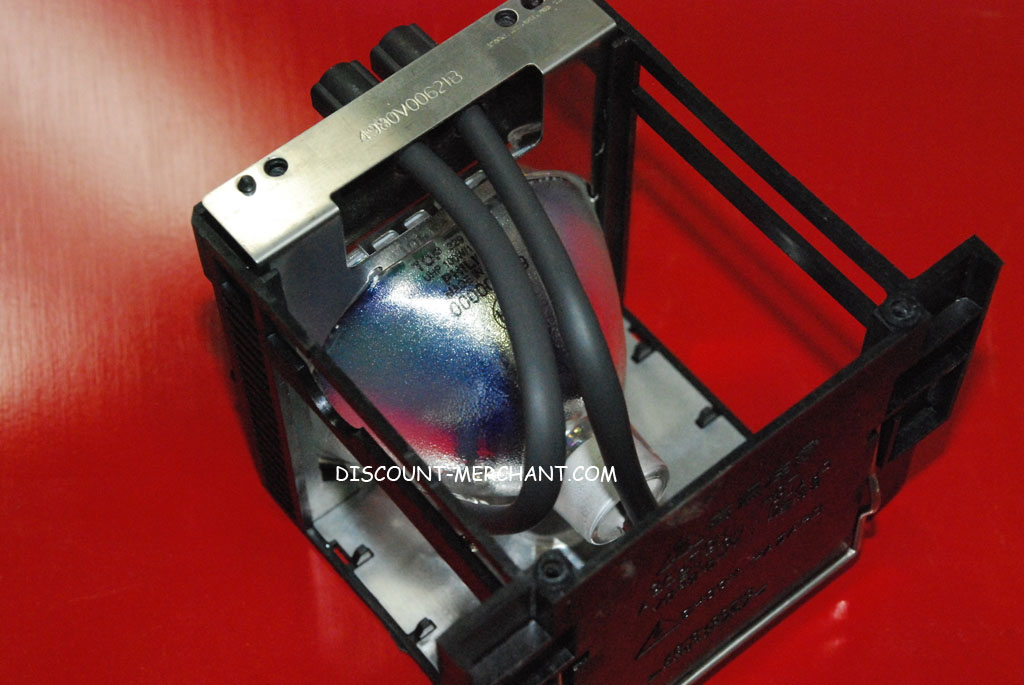
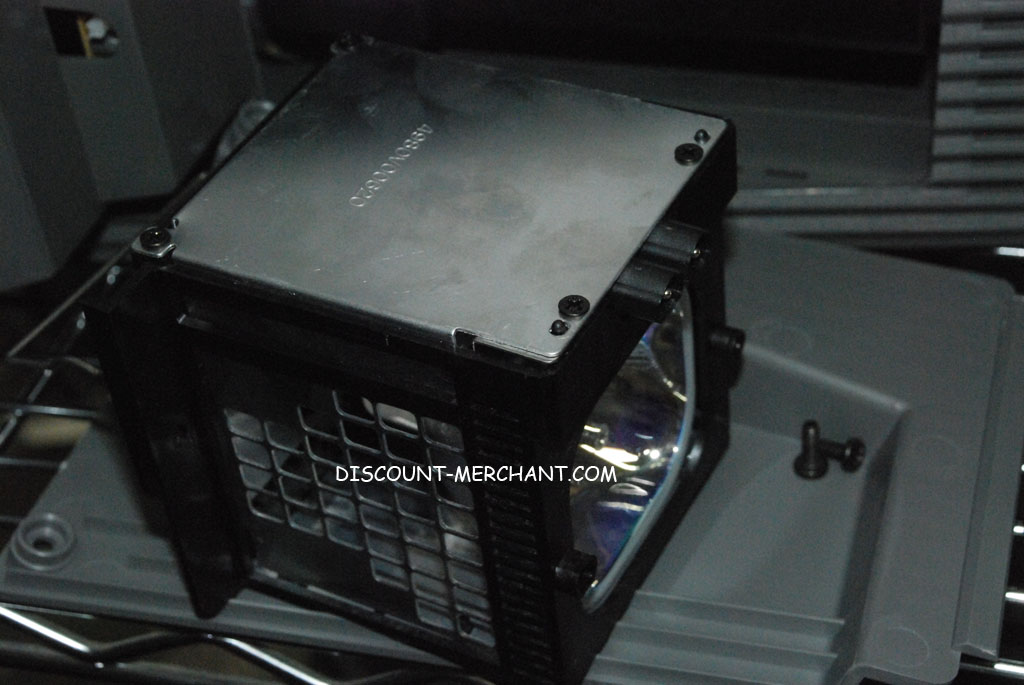
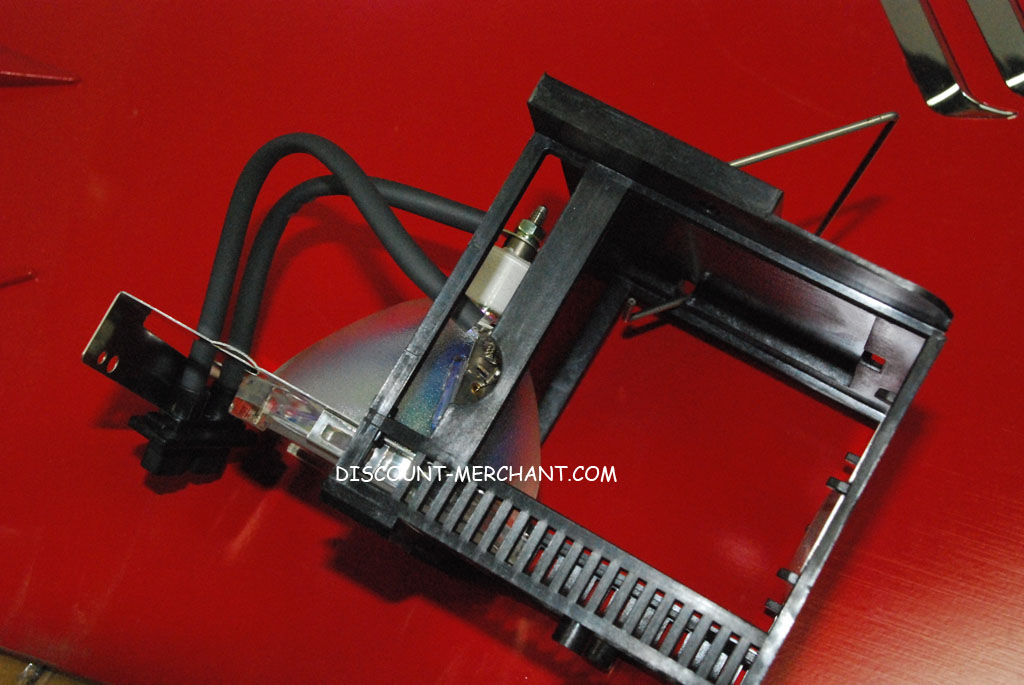
Now we can pull out the lamp along with the metal surround clip
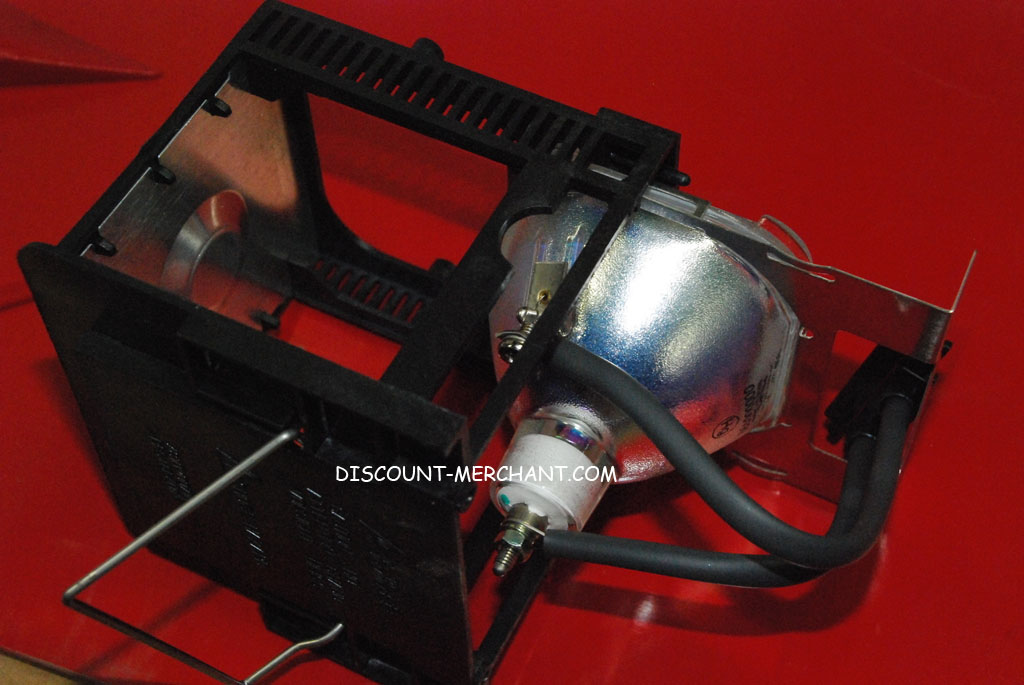
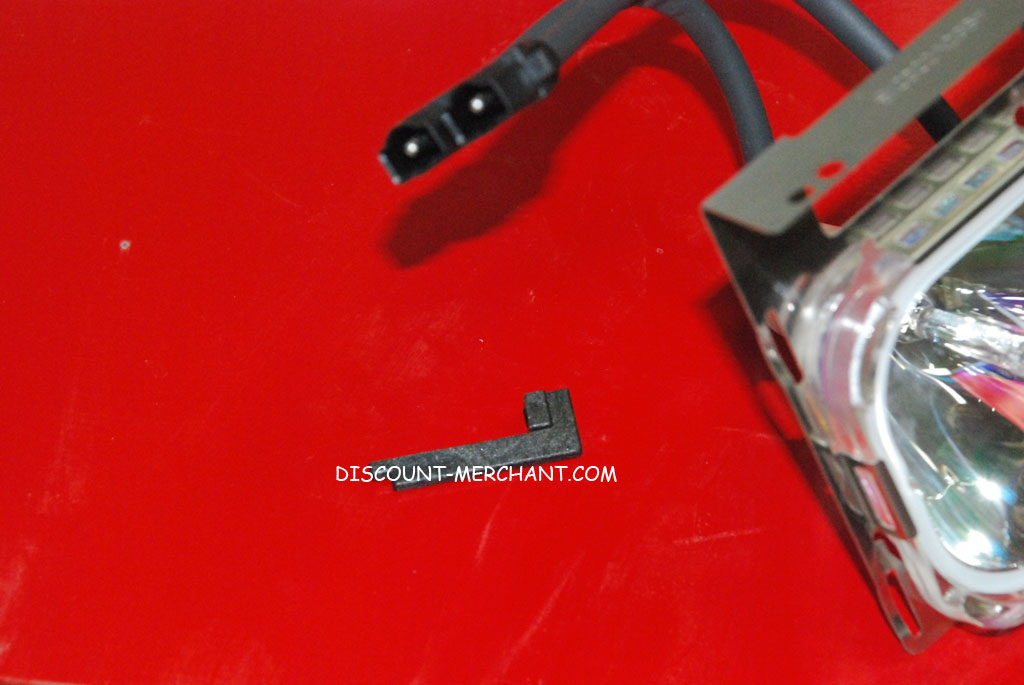
Step 6: Now it’s just a matter of removing the surround clip, on the new lamp and re-assembling the enclosure
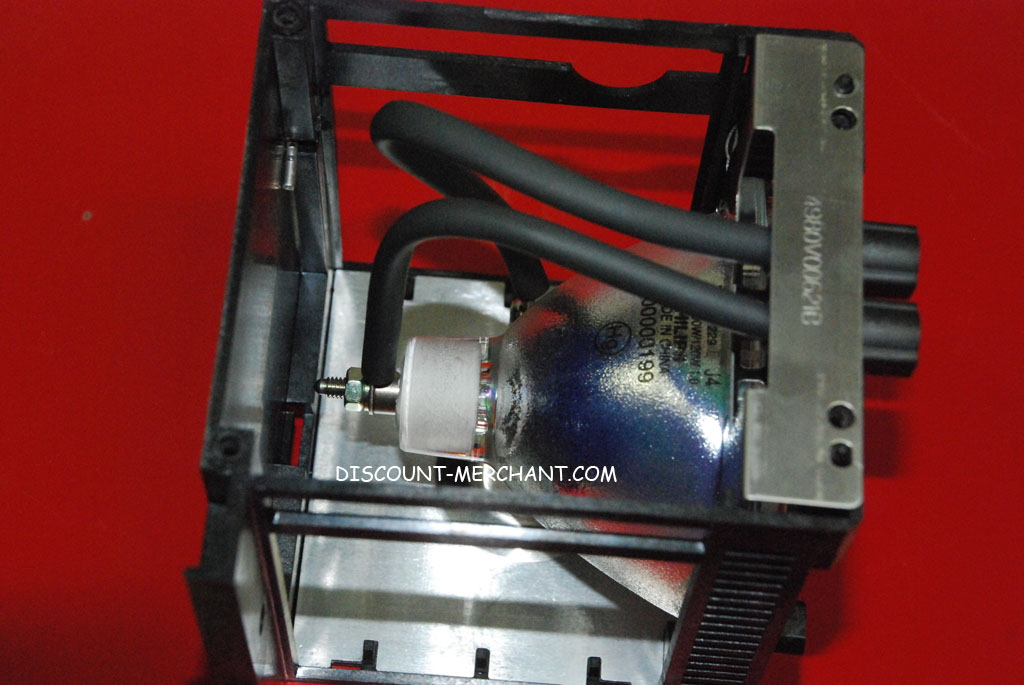
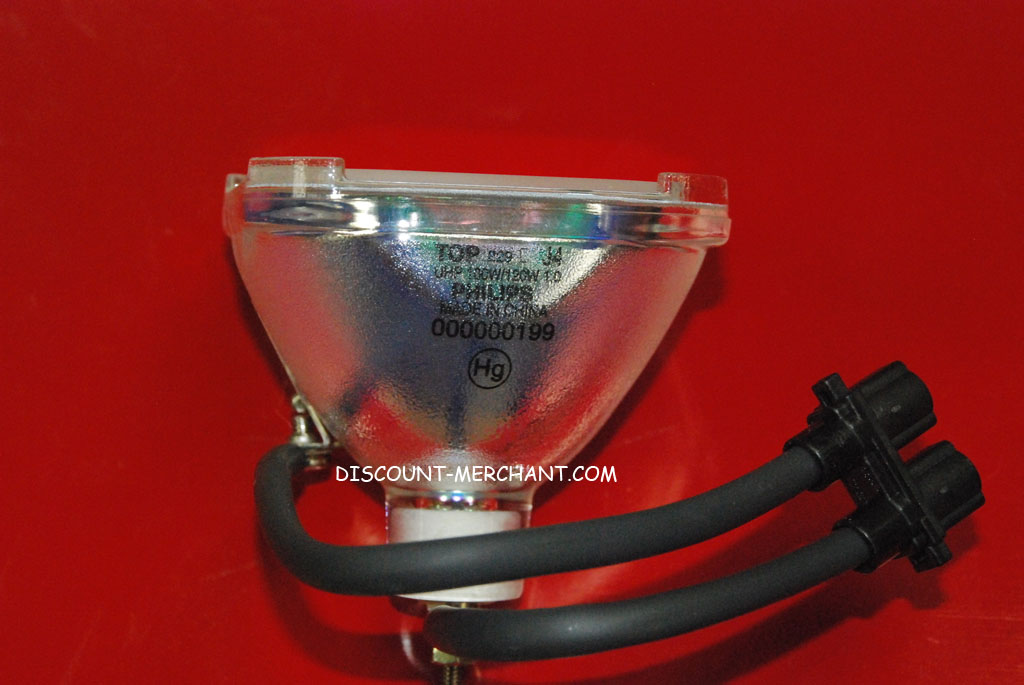
Before re-assembly, take a good look at your lamp…it’s a Philips manufactured part!

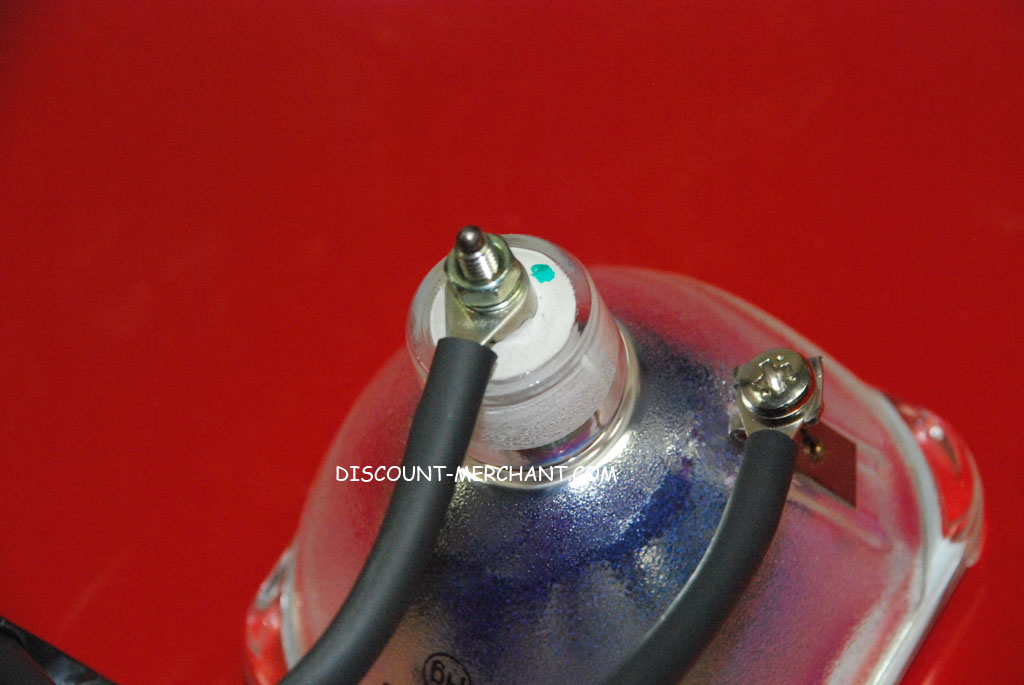
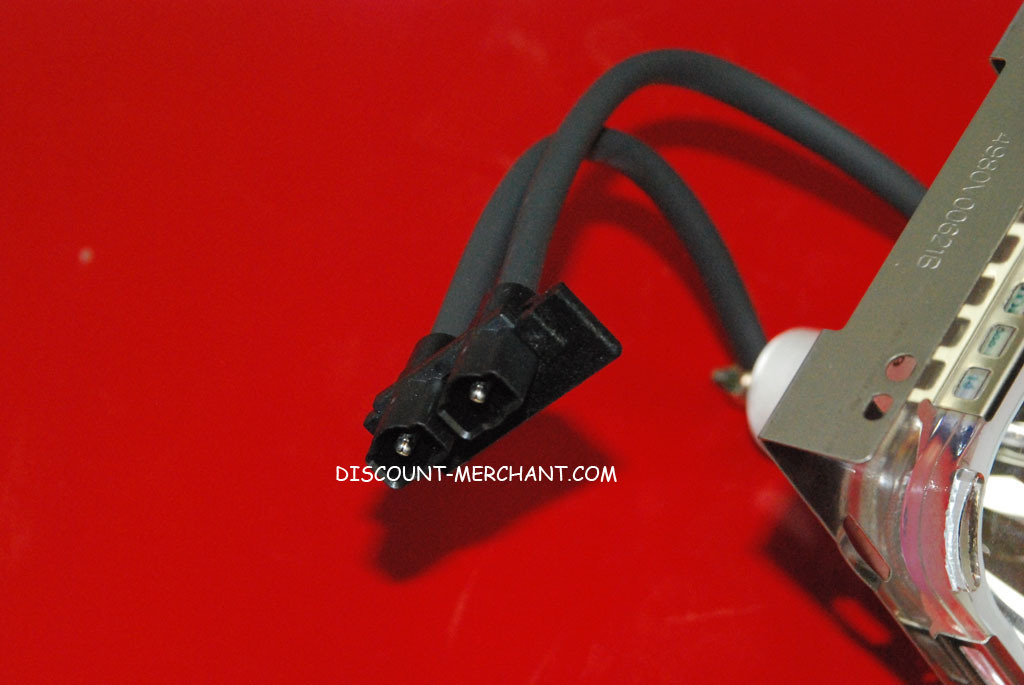
Step 7: Almost forgot why we needed the pliers…to loosen the nut holding the connector to the lamp
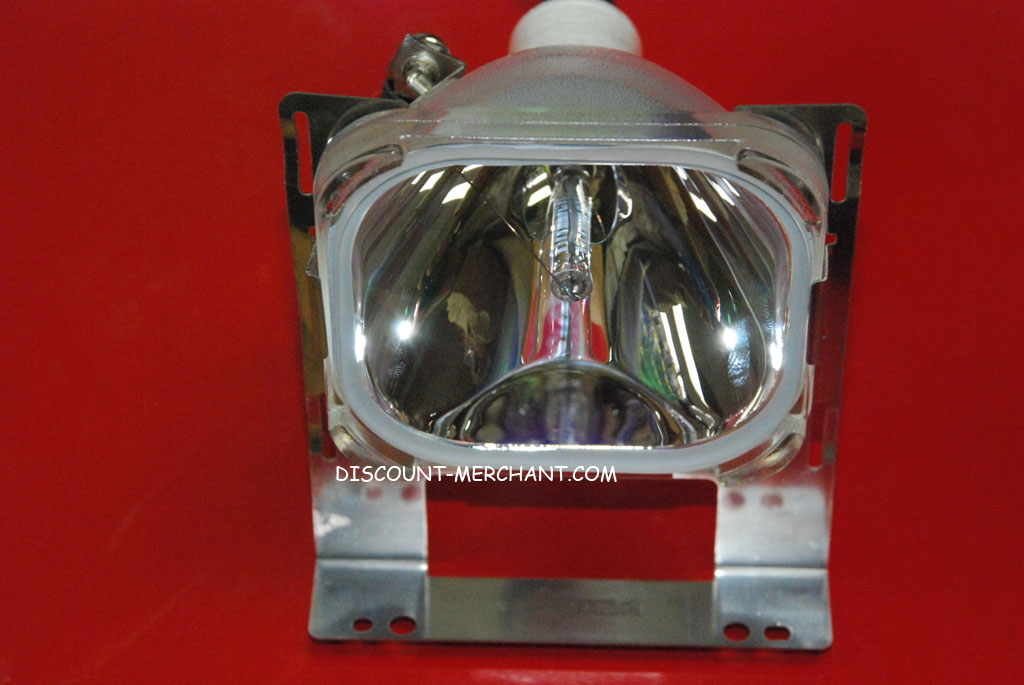
When installing the new lamp on the clip surround, make sure that the text on the lamp and the connector head align with the opening as shown below
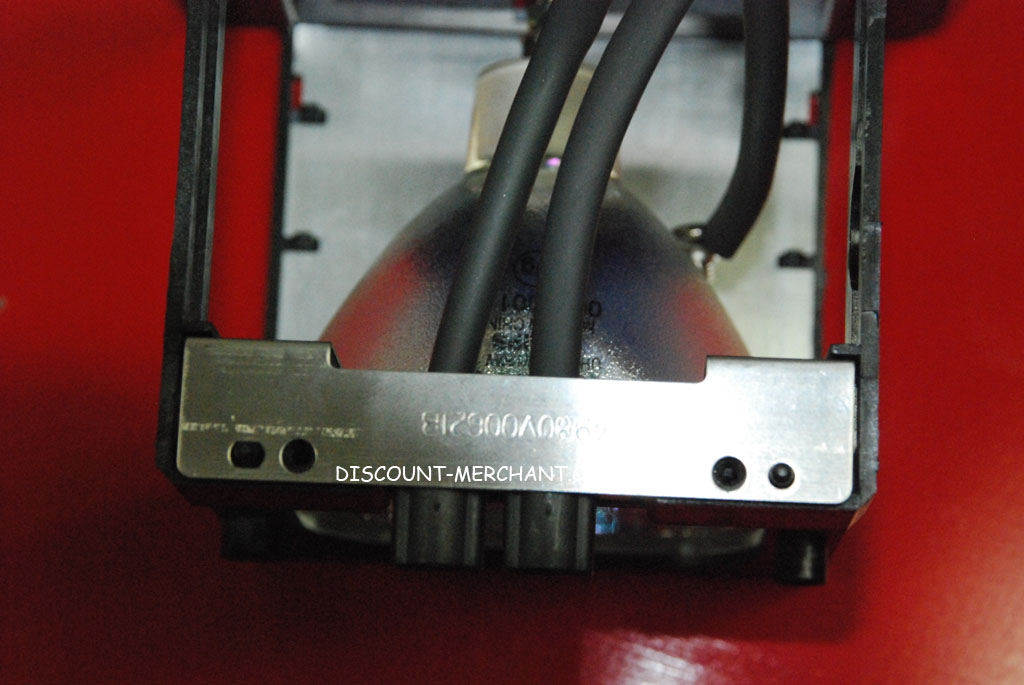
There is a chance a little plastic from the lead terminals is loose…just pop it back in place!
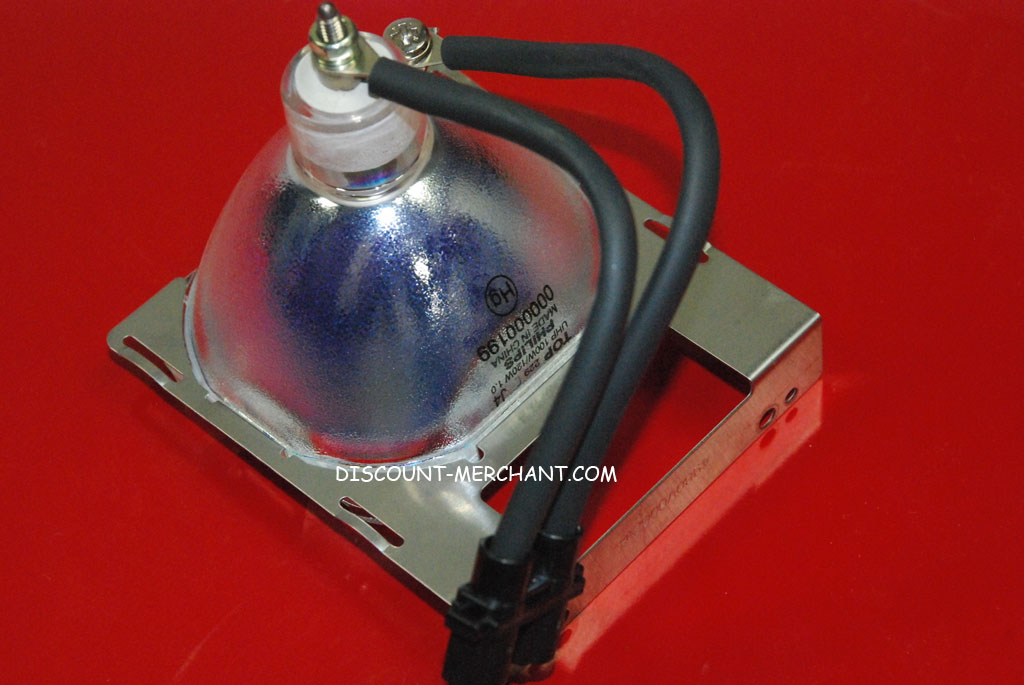
Once you’ve got the connector clip attached again, the lamp and surround clip can be slid back into the plastic housing
Now just put the metal cover back on the housing and reseat the lamp in place.
You’ve got 4 screws for the metal cover, and two more screws holding the lamp in place inside the TV. Then there is another two screws securing the enclosure access door. Make sure all screws are tight and the access door cover is in place before trying to turn on the TV.
IMPORTANT: The bulb should be handled with a clean cloth to avoid any dirt or oil. Our hands are naturally oily…this is a no-no for these lamps. It doesn’t hurt to do a final wipe with a clean, non-abrasive, lent free cloth before reinstalling your lamp..
Again, Discount-Merchant.com promises to be the low price leader in all Projection TV Lamps they carry…if this is not true, let us know and we’ll fix it!