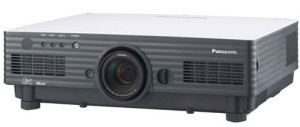
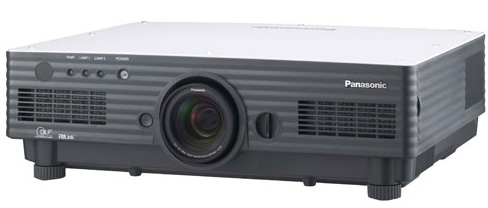
 This step-by-step instructional guide will help you install an new Panasonic PT-L5500 projector lamp.
When to replace
Depending on the working conditions and setting of the Panasonic PT-L5500 projector lamp life may vary. At at 1300 hours the Panasonic PT-L5500 projector lamp will be reaching end if life and a “Replace Lamp” warning is displayed on screen. That message will be permanently displayed on screen until the Panasonic ET-LAD55 projector is changed. Don’t leave the Panasonic PT-L5500 projector lamp as is after the warning message or the projector will automatically shut off and enter a standby state. It will remain in standby state until the Panasonic PT-L5500 projector lamp is changed.
Find this lamp sold on Amazon by these authorized dealers:
- PANASONIC ET-LAD55 / ET-LAD55W Replacement Bulb/Lamp with Housing Compatible for Projector PT-D5600U
- BND- PANASONIC SOLUTIONS COMPANY ET-LAD55 LAMP UNIT
- Panasonic ET-LAD55 Projector Lamp For Ptd5500/5600 – Ptdw5000 – Each
- Panasonic ET-LAD55L (Manufacturer OEM Projector Lamp,NOT Generic!) For PT-D5500U,PT-D5600U,TH-D5600,TH-D5500,PT-DW5000,PT-D5600UL,PT-D5600,PT-D5500UL,PT-D5500 Projectors, LONG-LIFE version!
- Panasonic Projector Lamp Part ET-LAD55-ER Model Panasonic PT PT-D5500 PT PT-D5500U
Choosing projector lamp options
The Panasonic PT-L5500 comes equipped with two Panasonic ET-LAD55 projector lamps. You have the option of using:
- SINGLE projector lamp mode: Either of the projector lamp is used – projector automatically chooses the lamp with the shorter operating hours.
- DUAL projector lamp mode: Both projector lamps are used.
- Projector LAMP1 : Lamp Unit 1 is always used alone.
- Projector LAMP2 : Lamp Unit 2 is always used alone.
When only one Panasonic ET-LAD55 projector lamp is used (SINGLE, LAMP1 or LAMP2 options) and it’s been used for 1500 hours consecutively, the Panasonic PT-DW5000U projectors automatically switches to the second lamp. When both Panasonic ET-LAD55 lamps are used simultaneously for 1300 hours straight, the projector will automatically go into standby mode. Create longer projector lamp life by controlling the luminance of the projector lamp:
- HIGH: Use when you need high brightness is necessary. Both lamps are used with this setting.
- LOW: Set when high brightness is not necessary. This reduces power and operating noise while using only one lamp.
The importance of authentic lamps
It’s easy to get duped into buying an inferior knock-off lamp posing as an authentic lamp. Buyer beware! Always look for the seal of approval and watch for telltale signs you are about to purchase a counterfeit lamp
- generics have inferior parts so are prone or overheat and explode
- generics have a short life and don’t last longer than a few months
- Often these lamps use toxic chemicals as substitutes
- generic’s can’t be calibrated properly and will damage your projector’s optics
- copycat manufacturers offer no guarantee or refunds
- the warranty on your Panasonic PT-L5500 projector will become void
Replacing the Panasonic ET-LAD55 projector lamp
Before replacing the Panasonic ET-LAD55 projector lamp follow these important safety step:
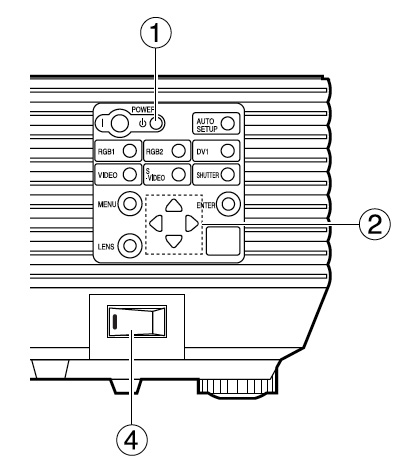
1. Press the POWER OFF button on the Panasonic PT-L5500 projector.
2. Select OK using the right or left arrows on the control panel. Press the ENTER button. (Or press the POWER OFF button again. The power indicator will light up orange.
3. Wait until the power indicator turns red and the cooling fans stop running on the Panasonic PT-L5500.
4. Press MAIN POWER to OFF.
Projector lamp installation steps:
1. Remove the power plug and wait for at least 45 minute for the projector to cool.
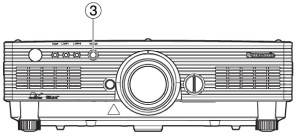
 2. Using a Phillips screwdriver, remove the screw securing the Panasonic PT-L5500 projector lamp cover. Slide the lamp unit cover toward the left to remove it. (See diagram #2)
3. Remove the two screws securing the fan unit. (See diagram #3)
4. Gently open the fan unit in front of the both Panasonic ET-LAD55 projector lamps. (See diagram #4)
5. Remove the screws holding the Panasonic ET-LAD55 projector lamp in place. (Each lamps has two screws. Take hold of the wire handle and gently remove the projector lamp. (See diagram #5)
NOTE: The Panasonic ET-LAD55 projector lamp contains mercury and should not be thrown into regular garbage. Recycle this projector lamp!
6. Install the new lamp unit taking care not the touch the actual project lamp bulb as oil from your fingers will remain on the bulb and burn black spots when the projector lamp heats up.
7. Use a Phillips screwdriver to securely tighten each of the two screws on both projector lamps. 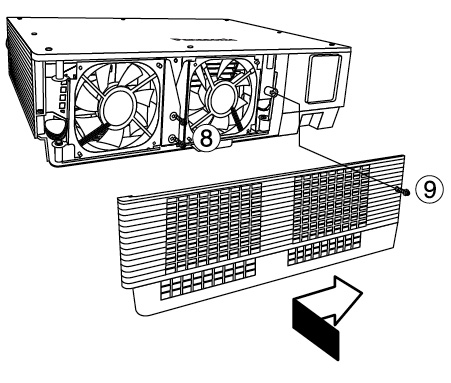
8. Put the fan back in place and tighten the two screens to hold it in place. (See diagram #8)
9. Slide the cover a little toward the right, and secure it by tightening the screw. (See diagram #9) NOTE: Firmly install the projector lamp unit and projector lamp cover. If not installed properly, the protection circuit will be activated and the projector will not turn back on.
Resetting the projector lamp timer
Each time you switch to a new Panasonic ET-LAD55 projector lamp you need to reset the Panasonic PT-L5500 projector lamp timer. 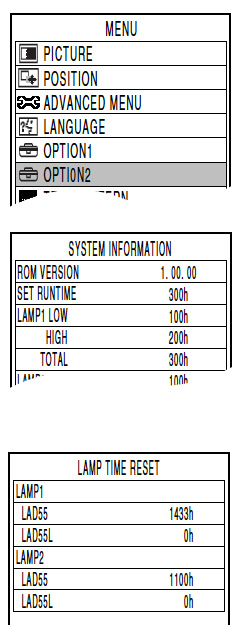
- Insert the power cord plug into the wall outlet and then press the MAIN POWER switch.
- Press the “ I ” button on the remote control to display an image picture onto the screen.
- Press MENU to display the MAIN MENU screen.
- Scroll down to select OPTION2. Press ENTER to display the OPTION 2 menu.
- Scroll down to SYSTEM INFORMATION. Press ENTER to display the SYSTEM INFORMATION menu.
- Press and hold the ENTER button on the projector or the remote control for approximately 3 seconds. The option LAMP TIME RESET will be added to the menu.
Scroll down to select the projector that has was replaced. Select the lamp which has been changed
- LAMP1: Replace the LAMP UNIT 1
- LAMP2: Replace the LAMP UNIT 2
- Press ENTER.
- When the LAMP TIME RESET display flashes, press ENTER again.
- The used hours of the specified lamp unit will be reset to zero.
- Press the MENU button to leave the LAMP TIME RESET menu.
Quick reset:
- When lamp unit 1 has been replaced: In standby mode, press the number buttons in the sequence of 737381, and then press ENTER.
- When lamp unit 2 has been replaced: In standby mode, press the number buttons in the sequence of 737382, and then press ENTER.
- When the projector lamps hours have been reset, the lamp monitor (LAMP1/LAMP2) will flash for 3 seconds.